

How to make an app: one build, with the clock running.

Founder, Newly
Most guides on how to make an app are a list of tools. This is one app, from an empty text box to a file you can install, with every prompt shown and the stage where the first prompt produced the wrong thing left in.
The short version: the making is now the fast part. Half an hour of typing gets you something a friend can install on their Android phone. Then you meet Apple’s $99 a year, Google’s $25 once, and a fourteen-day testing gate that no builder on earth can shorten. If you want to follow along rather than read, you can make an app with Newly and run the same three prompts as you go.
Key Takeaways
- One sentence is enough. A 43-character prompt with no roles, screens or styling produced a working two-tab app in one pass.
- Vagueness works when the shape is obvious. A plant reminder built itself; a team app guessed the wrong industry. Name the domain when it is not obvious.
- Your part is minutes. The stores’ part is days. First build, correction, backend prompt and APK fit in half an hour; Apple and Google review take up to two weeks.
- Two fees no builder waives. Apple Developer Program $99 a year, Google Play $25 once.
The shape of it
Six things have to happen. Only one of them is the app.
People asking how to create an app are usually picturing the second item on this list and nothing else. That is why first launches slip. Read the other five before you pick a tool, because they decide your calendar far more than your choice of stack does.
- 1
Decide what it is
One screen, four verbs. Anything vaguer produces a generic app whether the builder is a person or a model.
- 2
Build the thing
Screens, navigation, state. This is the part that used to take a fortnight and now takes an afternoon.
- 3
Put a server behind it
The moment you want accounts, or data that survives a reinstall, you need somewhere to keep it. Nothing else on this list changes as sharply between routes.
- 4
Make it look like a product
An icon, a name, screenshots, a listing. Worth its own read, here is the short version of generating the app icon, which is the one asset you cannot submit without.
- 5
Get accounts with Apple and Google
$99 a year and $25 once. Enrolment is paperwork and identity checks, not a formality, start it the week before you need it, not the day of.
- 6
Survive review
Apple is fast and picky. Google is slower and, for a new personal account, gated behind two weeks of real testers.
Four routes
How do you make an app? Four ways, one shared bill.
The interesting column is the last one. The route decides how fast you get a running app; it also decides whether you still have anything if the tool disappears.
| Route | What you actually do | Time to something installable | Cost | What you own |
|---|---|---|---|---|
| Write it yourself | Swift or Kotlin, or React Native for both at once. Plus the build tooling, the signing, the store metadata. | Weeks to months | Your time, then $99 + $25 | All of it, obviously |
| Hire someone | Write a spec, review builds, arbitrate scope. The brief is still your job, and a vague brief is expensive here rather than free. | Weeks to months | Quoted per project, then $99 + $25 | Whatever the contract says. Get the repository in writing. |
| Drag-and-drop no-code | Assemble screens in a visual editor and bind them to a data source. | Days | Subscription, then $99 + $25 | Varies sharply. Some platforms ship a web view in a native shell, check what the export actually contains before you commit. |
| AI app builder | Describe the app, correct it in chat, build the file. | Under an hour to an installable APK | From $25/mo, then $99 + $25 | With a code-generating one, the full React Native project via GitHub or ZIP. |
$99 and $25 appear in every row, because they are Apple’s and Google’s fees rather than anyone’s tooling. And the honest caveat on row four: if your app needs Apple Watch, Vision Pro, widgets or Live Activities, React Native does not reach all of that, and a native build, written by you or by someone you pay, is the right answer. If your product is essentially a website with a login, the right answer may be to not make an app at all.
The build
Half an hour of yours. Two weeks of theirs.
Below is a task manager taken from an empty box to an installable APK, then to the edge of a store listing. Three prompts, three credits, one of them spent on a correction. Open a stage to see what you type and what comes back. The stage sitting open is the one where it went wrong, because that is the stage every other guide deletes.
This is the stage that gets edited out of most walk-throughs. Something in the first build does not work, a control that is wired to nothing, a filter that returns everything, a keyboard that covers the field you are typing into. Newly's own documentation ships an example of exactly this shape, which tells you how routine it is.
The fix is not to re-describe the app. Name the screen, name the control, and say what happened instead of what you wanted. The second prompt below does that in two sentences.
Two things worth knowing before you get annoyed. A prompt that produces the wrong thing still costs one credit, because Newly bills per interaction rather than per amount of work. And a screenshot pasted into the chat is treated as evidence, for a visual bug it is faster than describing it.
Prompt 2, the correctionThe submit button on the add task screen isn't working. When I tap it, nothing happens.
Verbatim from docs.newly.app/quickstart. Screen named, control named, observed behaviour stated. No theory about the cause. 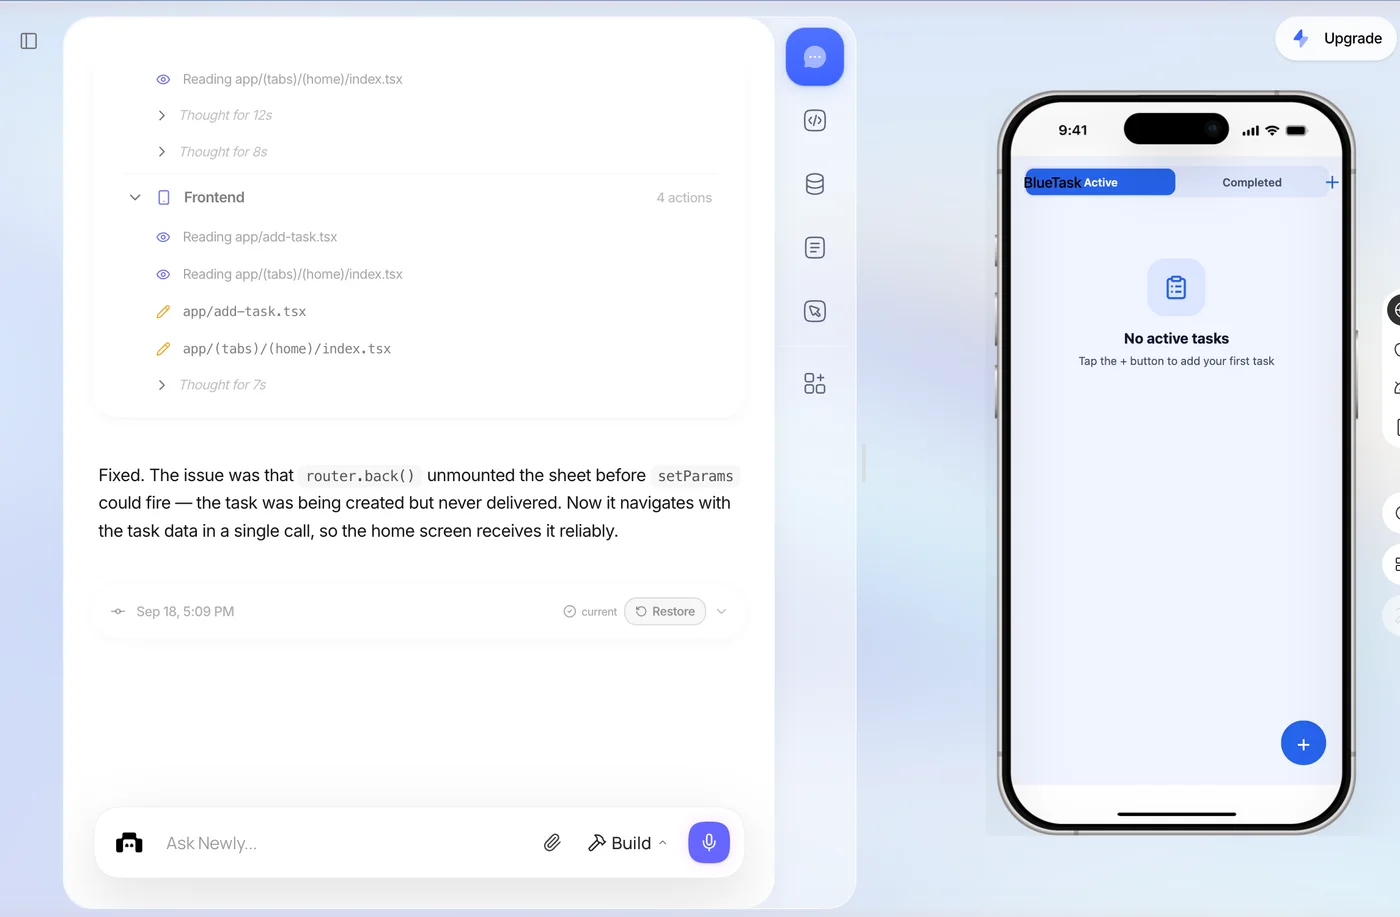
Name the screen and the control. Do not guess at the cause.
Where this walk-through stops
Three prompts is enough to show the loop and not enough to build anything real. A first app that people actually use lands somewhere around 10 to 30 prompts, which means 10 to 30 credits, and most of them go on the unglamorous half: empty states, the keyboard covering an input, what happens when the network drops. If you want the version that keeps going past the third prompt, take a longer first-app tutorial instead, and treat this page as the map.
Before you submit
The gap between a working app and a listed app.
Everything here is a submission blocker rather than a nice-to-have, and three of them are irreversible. Work down it once before you start filling in a store listing, and again before you press submit. The mechanics of the iOS side are covered in the guide to publishing it to the App Store.
- One sentence that says what the app is for, and four verbs a person performs in it
- An app icon: 1024 × 1024 PNG with no transparency for iOS, 512 × 512 for Android
- A bundle identifier in reverse-domain form you can live with permanently, it cannot be changed after the first submission
- A version code you have not used before, because Google will not accept a repeat
- release-keystore.p12 and keystore-credentials.txt, saved somewhere you will still have them in three years
- A privacy policy URL and a support URL that both resolve
- The backend pushed to production before you submit, so the reviewer is not testing against your dev environment
- An Apple Developer Program membership, a Google Play account, or both
- For a new personal Play account: 12 testers, opted in for 14 continuous days
Sources for the store facts on this page: Apple Developer Program enrolment, Apple on App Review timing, Google Play’s registration fee and Google’s 12-tester requirement. All four checked 10 September 2026.
What you should know first
Three things about this route that will annoy you.
There is no free tier
Newly starts at $25 a month for 50 credits and there is no free plan to try it on. Several competitors will let you type a prompt and see what comes back for nothing. If what you want is to poke at prompt-to-app builders before spending anything, start with one of those and come back.
A wrong answer costs the same as a right one
Billing is per interaction, not per amount of work. A prompt that rewrites four screens costs one credit; a prompt that misunderstands you and produces nothing useful also costs one credit. That is what makes precise prompts worth the extra thirty seconds, and it is why the correction in the timeline above names the screen and the control instead of saying “it’s broken”.
Deploying the backend empties your test data
A production deploy promotes your code and schema and then hands you a brand-new dev environment, same schema, no rows. Nothing is wiped, but the test account you made by hand lives in the previous dev database and will not log in any more. Build your sample data as a seed the backend runs on start, not by tapping through the app, or you will recreate it after every deploy.
FAQ
The questions that come after the first build.
The first build is the cheap part. Start there.
You now know what the whole thing costs, how long each half takes, and which four mistakes eat a weekend. The only step left is the one that takes two minutes: write the four verbs and see what comes back.
Describe your app and watch it build